
The Art of Floor Sanding in Melbourne: Reviving Your Surfaces
When it comes to interior design, your flooring holds immense sway over the overall aesthetics of your space. Beyond serving as a foundation, floors significantly impact the ambiance. Melbourne residents are fortunate because floor sanding can be the transformative solution to revitalize their floors.
Understanding Floor Sanding
What is Floor Sanding and Why It Matters
Floor sanding is the process of meticulously removing the top layer of a wooden floor’s surface. This meticulous approach is employed to eliminate imperfections, stains, and wear and tear that have accumulated over time. The result? Your floors are reinvigorated with a fresh and elegant appearance.
The Significance of Floor Sanding
Floor sanding is not just about aesthetics; it extends the lifespan of your wooden surfaces. By smoothing out rough spots and applying protective finishes, you’re not just enhancing the appearance; you’re also fortifying your floors against future damage.
The Art of Floor Sanding in Melbourne
Melbourne’s Unique Flooring Challenges
Melbourne’s climate, characterized by fluctuating humidity levels, can pose significant challenges to wooden floors. Understanding these challenges and addressing them appropriately is the foundation of successful floor sanding Melbourne.
The city’s climate tends to fluctuate, which can lead to the expansion and contraction of wood. This phenomenon often results in gaps and cracks in wooden floors, making floor sanding a frequent necessity. Additionally, Melbourne’s coastal location can introduce moisture, potentially causing wood to warp or rot. As a result, floor sanding takes on added importance as a means to maintain and protect your floors in this unique environment.
Selecting the Right Floor Sanding Equipment
Choosing the appropriate floor sanding equipment is of paramount importance. In a city where hardwood floors are commonplace, the selection of the right tools and abrasives plays a pivotal role in achieving professional results.
Investing in high-quality sanding machines and abrasives tailored to the specific needs of Melbourne’s wooden floors is essential. Coarser grits are typically employed initially to remove imperfections and old finishes effectively. As the sanding process progresses, finer grits come into play to ensure a smooth and refined finish. Combining this equipment with a keen understanding of the wood’s unique characteristics in Melbourne is key to achieving exceptional results.
Preparation and Safety
Preparing Your Workspace for Floor Sanding
Before embarking on your floor sanding journey, it’s essential to prepare your workspace thoroughly. This includes clearing the area, removing furniture, and ensuring a clean and dust-free environment.
Clearing the workspace involves removing all items, including furniture, rugs, and decor, to create an unobstructed area for the sanding process. This not only ensures the safety of your belongings but also allows for a more efficient and effective sanding experience. Moreover, it minimizes the risk of dust settling on your possessions during the process.
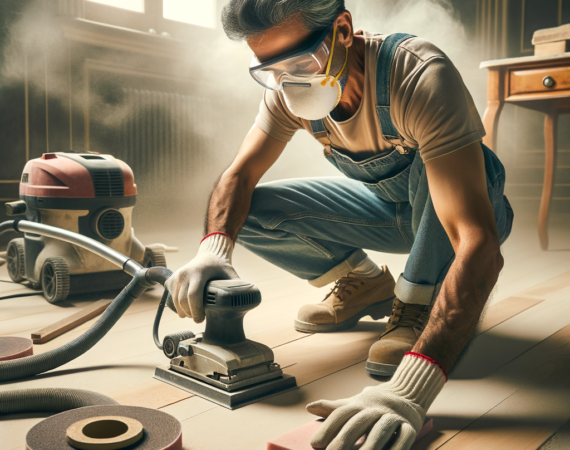
Essential Safety Precautions for Floor Sanding
Safety should always be a top priority when it comes to floor sanding. From donning protective gear to adhering to safety guidelines for your chosen equipment, taking precautions ensures a smooth and injury-free sanding process.
Protective gear, including safety goggles, ear protection, dust masks, and knee pads, should be worn at all times during floor sanding. These safeguards shield you from potential hazards such as airborne dust, loud noise, and flying debris. Additionally, it’s crucial to follow the safety instructions provided by the equipment manufacturers to avoid accidents and injuries.
Step-by-Step Floor Sanding Process
Initial Inspection and Surface Cleaning
Commence your floor sanding project by conducting a meticulous inspection of the floor’s condition. Identify imperfections and diligently clean any debris or dirt. A pristine surface is the canvas for a seamless sanding process.
The initial inspection is a critical step that allows you to assess the extent of damage or imperfections on your floors. Common issues to look out for include scratches, gouges, stains, and uneven areas. Once identified, these problem areas can be addressed effectively during the sanding process. Following the inspection, thorough surface cleaning is essential to remove dirt, dust, and any loose particles that could interfere with the sanding machinery.
Navigating Sanding Grits and Techniques
Understanding the nuances of different sanding grits and techniques is fundamental. Initiate the process with coarser grits, progressively transitioning to finer ones to ensure a flawless sanding outcome.
The choice of sanding grits and techniques is influenced by the condition of your floors. Coarser grits, with lower numbers, are employed to begin the sanding process. They efficiently remove old finishes, imperfections, and uneven areas. As the sanding progresses, finer grits with higher numbers are used to refine the surface and achieve a smoother finish. The transition between grits should be gradual and systematic to avoid over-sanding in one area, which can result in unevenness.
Tackling Gaps and Cracks
Melbourne’s climate variations can lead to gaps and cracks in wooden floors. Learn how to seamlessly fill these imperfections before proceeding with the sanding process.
Gaps and cracks in wooden floors are common in Melbourne due to the fluctuation in humidity levels. Addressing these imperfections is crucial to achieving a smooth and aesthetically pleasing result. Begin by thoroughly cleaning the gaps and cracks to remove any debris or dust. Then, choose an appropriate filler material that matches the wood’s color and characteristics. Apply the filler carefully, ensuring it fills the gaps completely and is level with the surrounding surface. Once the filler has dried, sand it down gently to achieve a seamless, uniform appearance.
Mastering the Final Sanding Pass
The final sanding pass is where your floors truly shine. Acquaint yourself with the right techniques to achieve a smooth and impeccable surface.
The final sanding pass is the culmination of your efforts, where your floors are transformed into a smooth and refined masterpiece. This step involves using the finest grit to create a polished and flawless surface. Pay close attention to detail, as any imperfections left behind at this stage will be noticeable in the final finish. Keep the sanding machine moving smoothly and consistently to avoid creating uneven patches. After the final pass, your floors should feel smooth to the touch, and the wood’s natural beauty should be evident.
Staining and Finishing
Picking the Perfect Stain
Selecting the perfect stain color and finish is a creative aspect of floor sanding. It has the potential to dramatically influence the final aesthetics of your floors.
Choosing the right stain color and finish is a crucial decision that impacts the overall look and feel of your floors. Melbourne residents often prefer stains that complement the city’s unique interior design aesthetics. Whether you opt for a classic, rich wood tone or a more modern, light finish, ensure that it complements your existing decor and personal preferences. Test a small section of your sanded floor with your chosen stain to confirm that it achieves the desired color and appearance.
Achieving a Flawless Finish
The application of the finish marks the concluding step that not only adds protection but also enhances the visual appeal of your floors. Learn the tricks of the trade to attain a professional finish that leaves a lasting impression.
The final finish you apply to your sanded floors serves both protective and aesthetic purposes. Applying the finish not only enhances the appearance but also safeguards your floors against wear and tear, moisture, and stains. When applying the finish, ensure that the room is well-ventilated to allow for proper drying. Apply thin, even coats with a quality applicator, allowing each coat to dry before applying the next. Sand lightly between coats to achieve a smooth and seamless finish. The number of coats required will depend on the type of finish you choose, so follow the manufacturer’s recommendations for the best results.
Maintaining Your Newly Sanded Floors
Top Tips for Cleaning and Maintenance
After your floors have undergone a stunning transformation through sanding, it’s crucial to maintain their appearance and durability. Explore cleaning and maintenance tips tailored to Melbourne’s unique climate to ensure lasting beauty.
Once your floors have been beautifully sanded and finished, proper maintenance is essential to preserve their appearance and longevity. Melbourne’s climate, with its variable humidity levels, demands specific care to prevent damage and keep your floors looking their best. Here are some top tips for cleaning and maintaining your newly sanded floors:
- Regular Cleaning: Sweep or vacuum your floors regularly to remove dust and dirt. Use a soft-bristle broom or a vacuum cleaner with a hardwood floor attachment to prevent scratches.
- Damp Mopping: Occasionally damp mop your floors using a well-wrung, slightly damp mop. Avoid excessive water, as it can damage the wood.
- Spill Cleanup: Clean up spills immediately to prevent staining and water damage. Use a damp cloth or mop for liquids and a dry cloth for solids.
- Protective Mats: Place mats or rugs at entrances and high-traffic areas to capture dirt and moisture before it reaches your floors.
- Furniture Pads: Use furniture pads or felt protectors under the legs of furniture to prevent scratches and dents.
- Humidity Control: Maintain consistent indoor humidity levels to prevent wood expansion and contraction. Use a humidifier or dehumidifier as needed.
- Professional Maintenance: Periodically hire professionals for maintenance, such as deep cleaning and reapplying finish, to keep your floors in top condition.
By following these cleaning and maintenance tips, you can enjoy the beauty and durability of your sanded floors for years to come, even in Melbourne’s unique climate.
Benefits of Professional Floor Sanding Services
Why Choose Professional Floor Sanding in Melbourne
While DIY floor sanding can be rewarding, professional services in Melbourne offer unique advantages. These include expert knowledge, time-saving convenience, and access to advanced equipment, ensuring optimal results.
Opting for professional floor sanding services in Melbourne provides several compelling benefits, particularly in this unique flooring environment:
- Expertise: Professional floor sanders have in-depth knowledge of Melbourne’s specific flooring challenges and can address them effectively.
- Time-Saving: Professionals can complete floor sanding projects more efficiently, saving you time and effort.
- Quality Equipment: Professional services have access to high-quality equipment and materials, ensuring a superior finish.
- Dust Control: Professionals employ dust containment systems to minimize the dust and debris generated during sanding.
- Warranty: Many professional services offer warranties or guarantees, providing peace of mind regarding the quality of their work.
While DIY floor sanding can be a fulfilling project, it’s essential to weigh the advantages of professional services, particularly in a region like Melbourne where floors endure unique conditions.
DIY vs. Professional Floor Sanding
Weighing the Pros and Cons
Discover the pros and cons of both DIY floor sanding and professional services to make an informed decision based on your specific needs and priorities.
When it comes to floor sanding, you have two main options: tackling the project yourself or enlisting the services of professionals. Each approach has its advantages and disadvantages, and your choice will depend on various factors, including your budget, available time, skill level, and the condition of your floors.
DIY Floor Sanding:
Pros:
- Cost Savings: DIY sanding can be more budget-friendly, as you won’t incur professional service fees.
- Personal Satisfaction: Completing a DIY project can be personally rewarding and empowering.
- Flexible Schedule: You can work at your own pace and schedule.
Cons:
- Skill and Knowledge: DIY sanders may lack the expertise to handle unique challenges, leading to potential mistakes.
- Time-Consuming: DIY projects often take longer to complete, especially for beginners.
- Equipment Rental: Renting sanding equipment can add to the overall cost and complexity of the project.
Professional Floor Sanding:
Pros:
- Expertise: Professionals bring extensive knowledge and experience, ensuring a high-quality result.
- Time Efficiency: Professionals work efficiently, completing projects in less time.
- Quality Equipment: Access to professional-grade equipment and materials ensures superior results.
Cons:
- Cost: Professional services typically come with a price tag, which may not fit every budget.
- Scheduling: You’ll need to coordinate with the service provider’s schedule, which may require flexibility on your part.
Ultimately, the decision between DIY and professional floor sanding hinges on your priorities and resources. If you’re comfortable with the process, have the time to invest, and are working with a limited budget, DIY can be a viable option. However, if you value expertise, efficiency, and a high-quality finish, opting for professional floor sanding services is a wise choice, particularly in Melbourne’s unique flooring landscape.
Conclusion
In Melbourne, where the climate can be challenging for wooden floors, mastering the art of floor sanding is a valuable skill. Whether you choose to embark on a DIY project or opt for professional services, the end result will be floors that not only look stunning but also stand the test of time. Prepare to breathe new life into your living spaces with the art of floor sanding in Melbourne.
…
Read More


